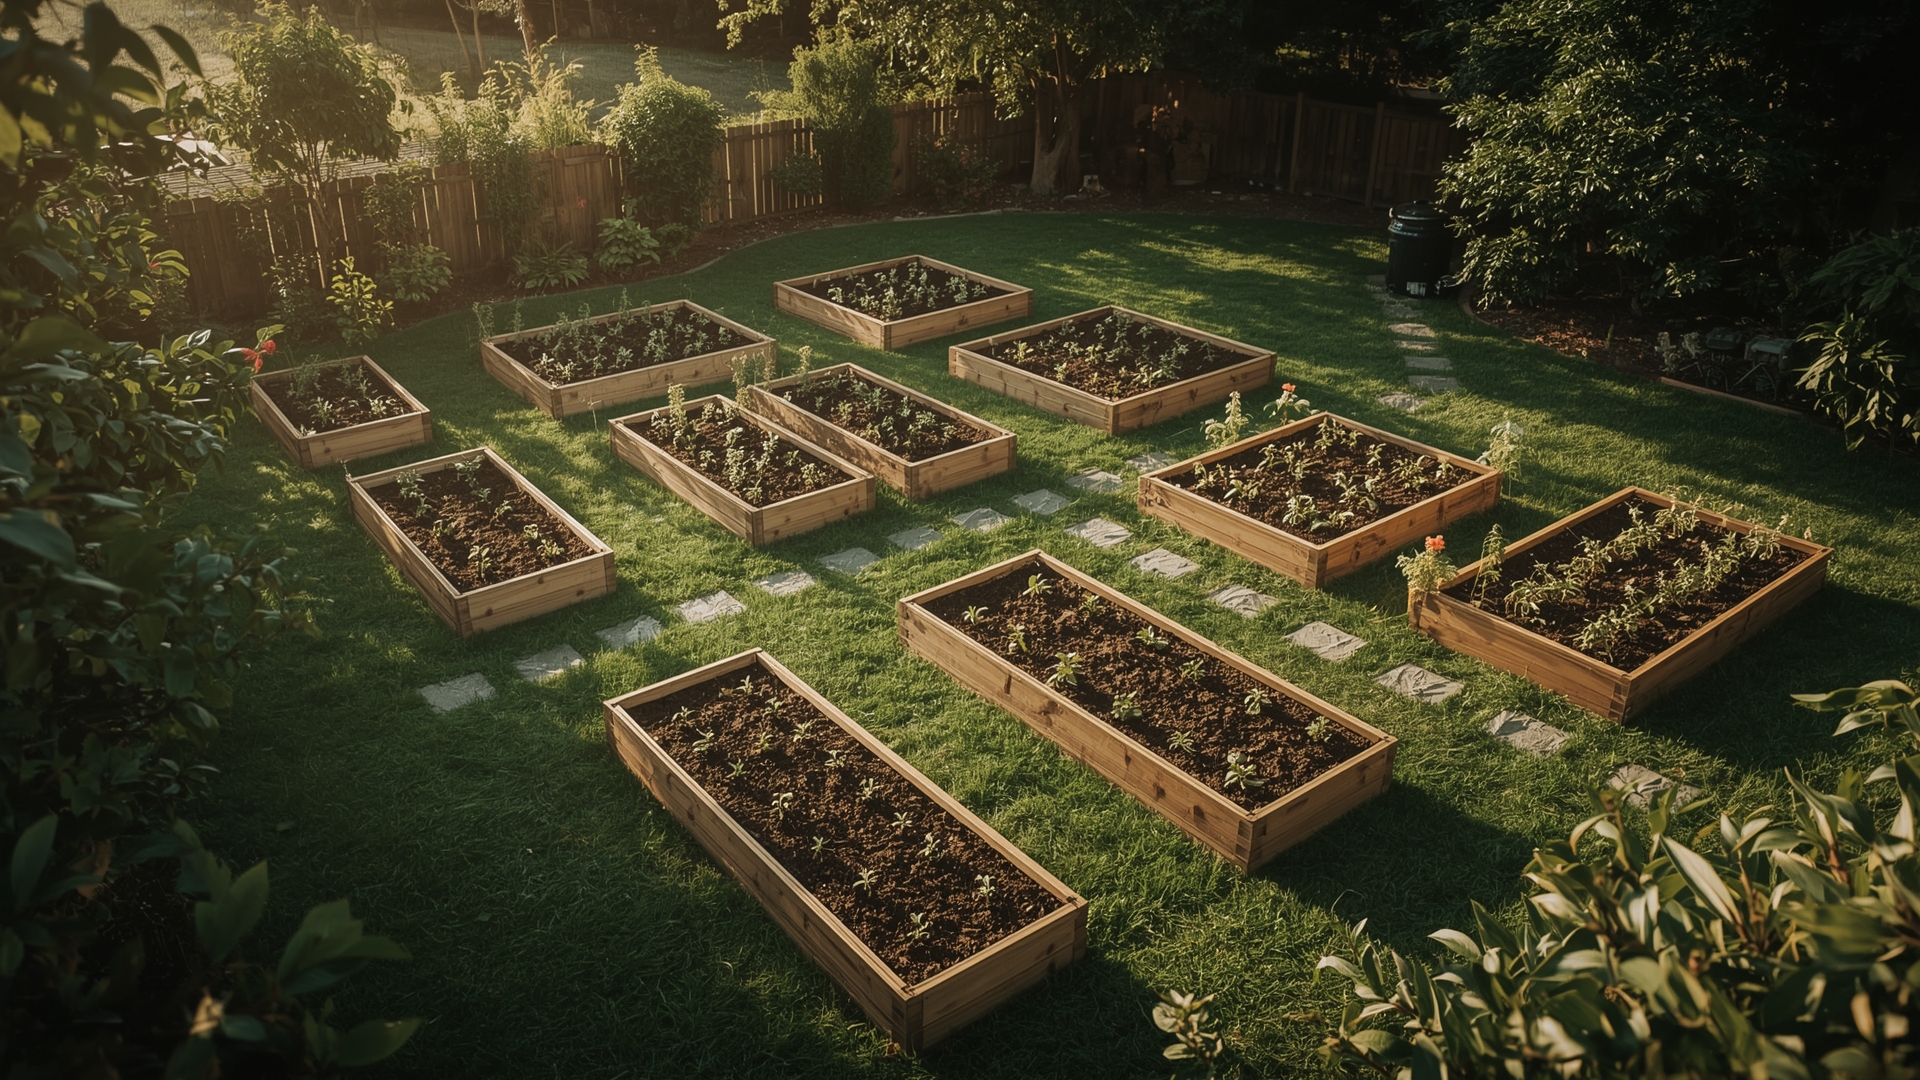
A garden bed without a layout plan is like building a room without measuring first. You end up with plants crowded in the wrong spots, awkward gaps, and a space that never quite looks finished. A thoughtful layout solves all of that before you dig a single hole.
Garden bed layout design covers three things: the shape of the bed itself, how you arrange plants inside it, and how much space each plant gets. Get those three things right and your bed will look intentional, grow better, and need less maintenance over time.
Key Takeaways
- Bed shape drives visual impact. Rectangular beds suit structured gardens, while curved beds soften a landscape and blend naturally into lawn edges.
- Planting geometry determines density and airflow. Triangular offset spacing fits 15% more plants than square grid spacing without crowding.
- Mixed beds need a tiered height structure. Place tall plants at the back (or center for island beds), mid-height in the middle, and low growers at the front edge.
- Spacing rules differ between annuals and perennials. Perennials need their mature spread accounted for at planting time; annuals can be planted closer since they’re replaced seasonally.
- Border design unifies the bed with the rest of the landscape. A defined edge — whether steel, stone, or a mow strip — keeps the layout looking clean year-round.
- Access paths matter as much as planting plans. No point should be more than 24 inches from a reachable edge to avoid stepping into the bed and compacting soil.
What Are the Best Shapes for a Garden Bed Layout?

Quick Answer: Rectangular, L-shaped, kidney, oval, and circular are the most common garden bed shapes. Rectangles suit structured spaces, curves integrate better with natural landscapes, and L-shapes work well around corners or structures like fences and patios.
The shape of your bed sets the tone for the entire garden. A sharp rectangle communicates order and structure. A sweeping kidney curve feels relaxed and organic. Neither is better in absolute terms — the right shape depends on your space, your style, and your soil.
Rectangular and Square Beds
Rectangular beds are the easiest to plan and maintain. They’re simple to divide into planting zones, align well with fences and walls, and make crop rotation or seasonal swaps straightforward. A standard size is 4 feet wide by 8 feet long, which lets you reach the center from either side without stepping in.
Square beds work especially well in formal gardens or kitchen gardens where symmetry matters. You can tile multiple squares together with stepping paths between them to create a structured grid layout.
Curved and Organic-Shaped Beds
Kidney-shaped, oval, and freeform curved beds look best in cottage gardens, naturalistic landscapes, or anywhere a lawn meets a planted area. The curve draws the eye along the edge rather than stopping it at a corner.
When laying out a curved bed, use a garden hose to test the shape on the ground before cutting. Smooth, flowing curves look intentional. Tight, choppy S-curves look accidental. Keep the arc gentle and consistent.
L-Shaped and Corner Beds
L-shaped beds are underused but highly practical. They wrap around corners of patios, sheds, or fences and use space that would otherwise stay empty. The inside corner of an L-shape is a natural focal point — a great spot for a taller specimen plant or a decorative element like a trellis.
| Shape | Best Setting | Minimum Size | Max Reach Depth | Design Style |
|---|---|---|---|---|
| Rectangle | Vegetable, formal, kitchen garden | 4 ft × 4 ft | 24 in from each side | Structured, contemporary |
| Square | Formal, symmetrical layouts | 3 ft × 3 ft | 18 in from each side | Formal, geometric |
| Kidney / Oval | Lawn borders, naturalistic | 6 ft long | 24 in from front edge | Cottage, relaxed |
| Circular (island) | Focal point, center of lawn | 5 ft diameter | 30 in (center access) | Formal or cottage |
| L-Shape | Corners, fences, patios | 4 ft each arm | 24 in from outer edges | Contemporary, practical |
How Does Planting Geometry Affect a Garden Bed Layout?
Quick Answer: Planting geometry is the pattern you use to space plants. Triangular offset spacing places 15% more plants per square foot than a square grid and reduces bare soil. Square grids are simpler to plan but leave more exposed ground between plants.
Most gardeners use one of two geometric patterns when placing plants: square grid spacing or triangular offset spacing. Both work, but they perform very differently in terms of plant density and visual coverage.
Square Grid Spacing
Square grid spacing places each plant at equal distances in straight rows and columns. It looks neat and is easy to plan on paper. The downside is that the space between four plants forms a diamond of exposed soil that takes longer to fill in.
Square grid works well for vegetables, annuals you’re replacing seasonally, and any planting where you want easy access to individual plants for harvesting or deadheading.
Triangular Offset Spacing
Triangular offset spacing staggers each row so plants sit between the gaps of the row in front. This is the pattern you see in natural meadows and professional planting schemes. It covers ground faster, reduces weed pressure (less exposed soil), and creates a more natural, layered look.
To use offset spacing, plant your first row, then shift your second row by half the spacing distance. Keep alternating. For a plant with a 12-inch spread, offset rows by 6 inches.
Diagonal Grid Layouts
A diagonal grid rotates the square grid 45 degrees relative to the bed edge. This creates a dynamic visual rhythm and works particularly well in formal parterre-style beds. It’s slightly more complex to plan but creates striking results in geometric beds viewed from above — like a second-story window or a raised terrace.
| Pattern | Plants per 10 sq ft (12-in spacing) | Ground Coverage Speed | Weed Suppression | Best For |
|---|---|---|---|---|
| Square Grid | 10 plants | Moderate | Fair | Vegetables, annuals, structured beds |
| Triangular Offset | 11.5 plants | Fast | Good | Perennials, groundcovers, mixed borders |
| Diagonal Grid | 10 plants | Moderate | Fair | Formal beds, parterre designs |
| Random / Natural | Varies | Variable | Depends on density | Meadow, naturalistic plantings |
How Do You Design a Border Bed With Mixed Perennials and Annuals?
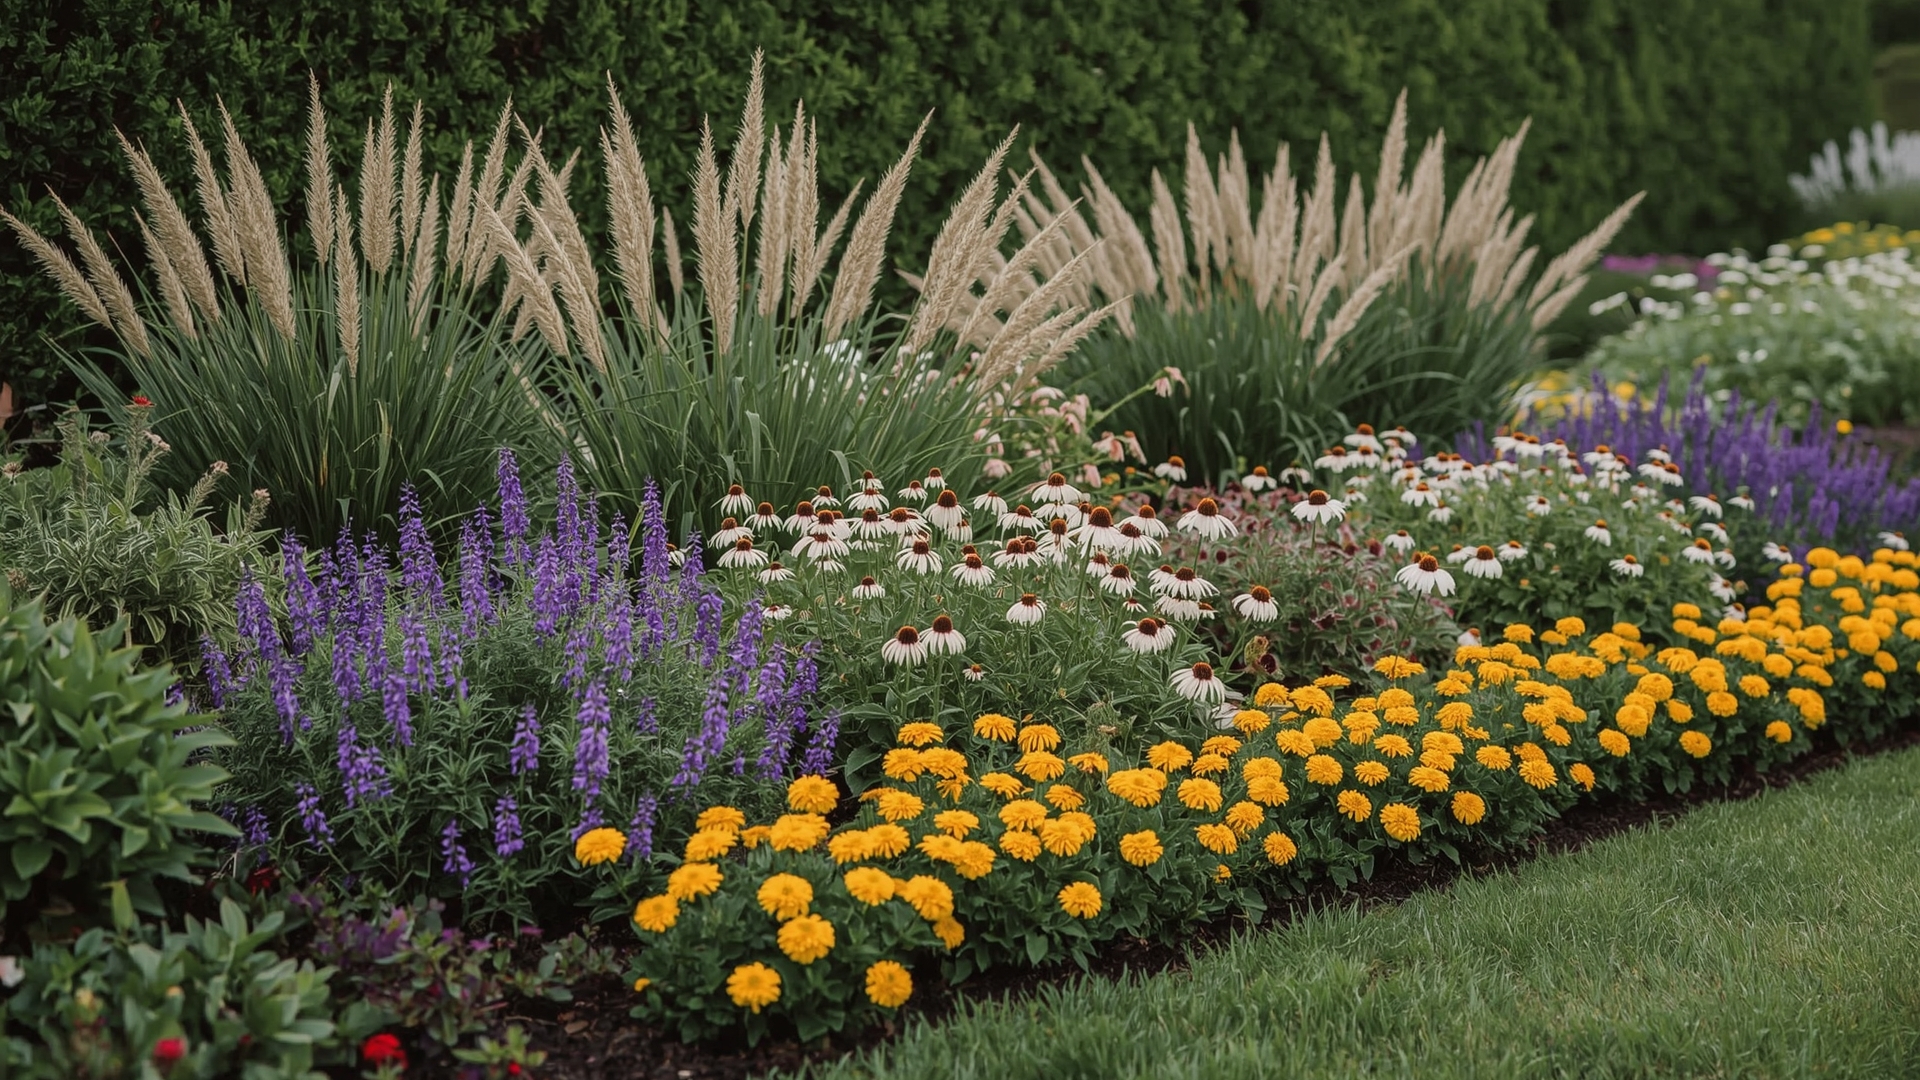
Quick Answer: Design a mixed border using a three-layer height structure — tall plants at the back (over 36 inches), mid-height plants in the middle (18 to 36 inches), and low edging plants at the front (under 18 inches). Annuals fill seasonal gaps between slower-growing perennials.
Mixed borders combining perennials and annuals are the most versatile type of garden bed. They give you continuous color across seasons, structural interest from perennials, and the flexibility to change the look annually.
The Three-Layer Height Rule
Every well-designed border bed uses a tiered height structure. Tall plants go at the back — these are your anchors. Mid-height plants form the main body of the bed. Low, spreading plants sit at the front edge and soften the transition to lawn or path.
For island beds (visible from all sides), reverse this structure outward from the center: tallest in the middle, shortest at the outer edge all around.
Placing Perennials First
Perennials are the bones of a mixed border. They come back every year, so they need their permanent positions decided first. Place them based on their mature size, not their size at planting. A clump of Rudbeckia (black-eyed Susan) spreads 18 to 24 inches wide at maturity. Plant it 12 inches wide in a 12-inch space and it’ll be overcrowded by year two.
Perennials also have specific bloom windows. Map out which perennials bloom in spring, summer, and fall so the bed has color across the whole growing season. Layering bloom times is one of the most important design moves in a mixed border.
Using Annuals to Fill Seasonal Gaps
Annuals are the flexible layer. They bloom hard for one season and then get replaced. Use them to fill the bare spots between newly planted perennials that haven’t spread to their full size yet. They also let you introduce seasonal color themes — warm oranges and reds in fall, cool blues and whites in summer — without committing permanently.
Good annuals for filling border gaps include zinnias, marigolds, petunias, snapdragons, and cosmos. Most reach useful size within 6 to 8 weeks of transplanting.
| Plant Type | Height Range | Spacing at Planting | Mature Spread | Position in Bed |
|---|---|---|---|---|
| Ornamental Grasses (perennial) | 3 to 6 ft | 24 to 36 in | 24 to 48 in | Back row / center |
| Rudbeckia / Echinacea (perennial) | 2 to 4 ft | 18 to 24 in | 18 to 24 in | Middle row |
| Salvia nemorosa (perennial) | 18 to 24 in | 15 to 18 in | 12 to 18 in | Middle to front |
| Zinnias (annual) | 12 to 36 in | 9 to 12 in | 9 to 18 in | Gap filler, middle |
| Marigolds (annual) | 6 to 24 in | 8 to 12 in | 8 to 12 in | Front edge, gaps |
| Catmint / Nepeta (perennial) | 12 to 18 in | 18 to 24 in | 24 to 36 in | Front edge, spill |
What Spacing Rules Should You Follow for Garden Bed Plants?
Quick Answer: Space plants based on their mature spread, not their transplant size. A general rule: spacing equals 50 to 75% of mature spread for perennials in a new bed. Annuals can be planted 10 to 20% closer since they don’t have multiple growing seasons to expand.
Spacing mistakes are among the most common in garden bed design. Plant too close and you create overcrowding, poor airflow, and disease pressure. Plant too far apart and you get a sparse, unfinished look that takes years to fill in.
How to Calculate Proper Spacing
Look at the mature spread on the plant tag. If a perennial spreads to 24 inches, space it 18 to 20 inches from its neighbor. This allows plants to eventually touch without severe overcrowding, creates a full look within two to three growing seasons, and still allows adequate airflow at ground level.
For annuals, you can push plants closer since they won’t be there long enough to cause structural problems. A plant with an 18-inch spread can be placed 12 to 14 inches apart for a fuller, denser seasonal display.
Spacing for Soil Health and Airflow
Crowded plants compete for water, nutrients, and light. They also trap moisture between leaves, which encourages fungal diseases like powdery mildew. Follow the spacing guides for perennials, especially in humid climates.
If you’re in a hot, dry climate, you can space plants slightly tighter than the tag suggests. The reduced ground exposure helps retain soil moisture and cuts down on irrigation needs.
Access Spacing Within the Bed
The 24-inch access rule: no point in a bed should be more than 24 inches from an edge you can reach from. This keeps you from stepping into the bed, which compacts soil and damages shallow root systems. For a bed wider than 48 inches, add a stepping stone path or leave a stepping gap every 4 to 6 feet.
How Should You Design the Edges and Borders of a Garden Bed?
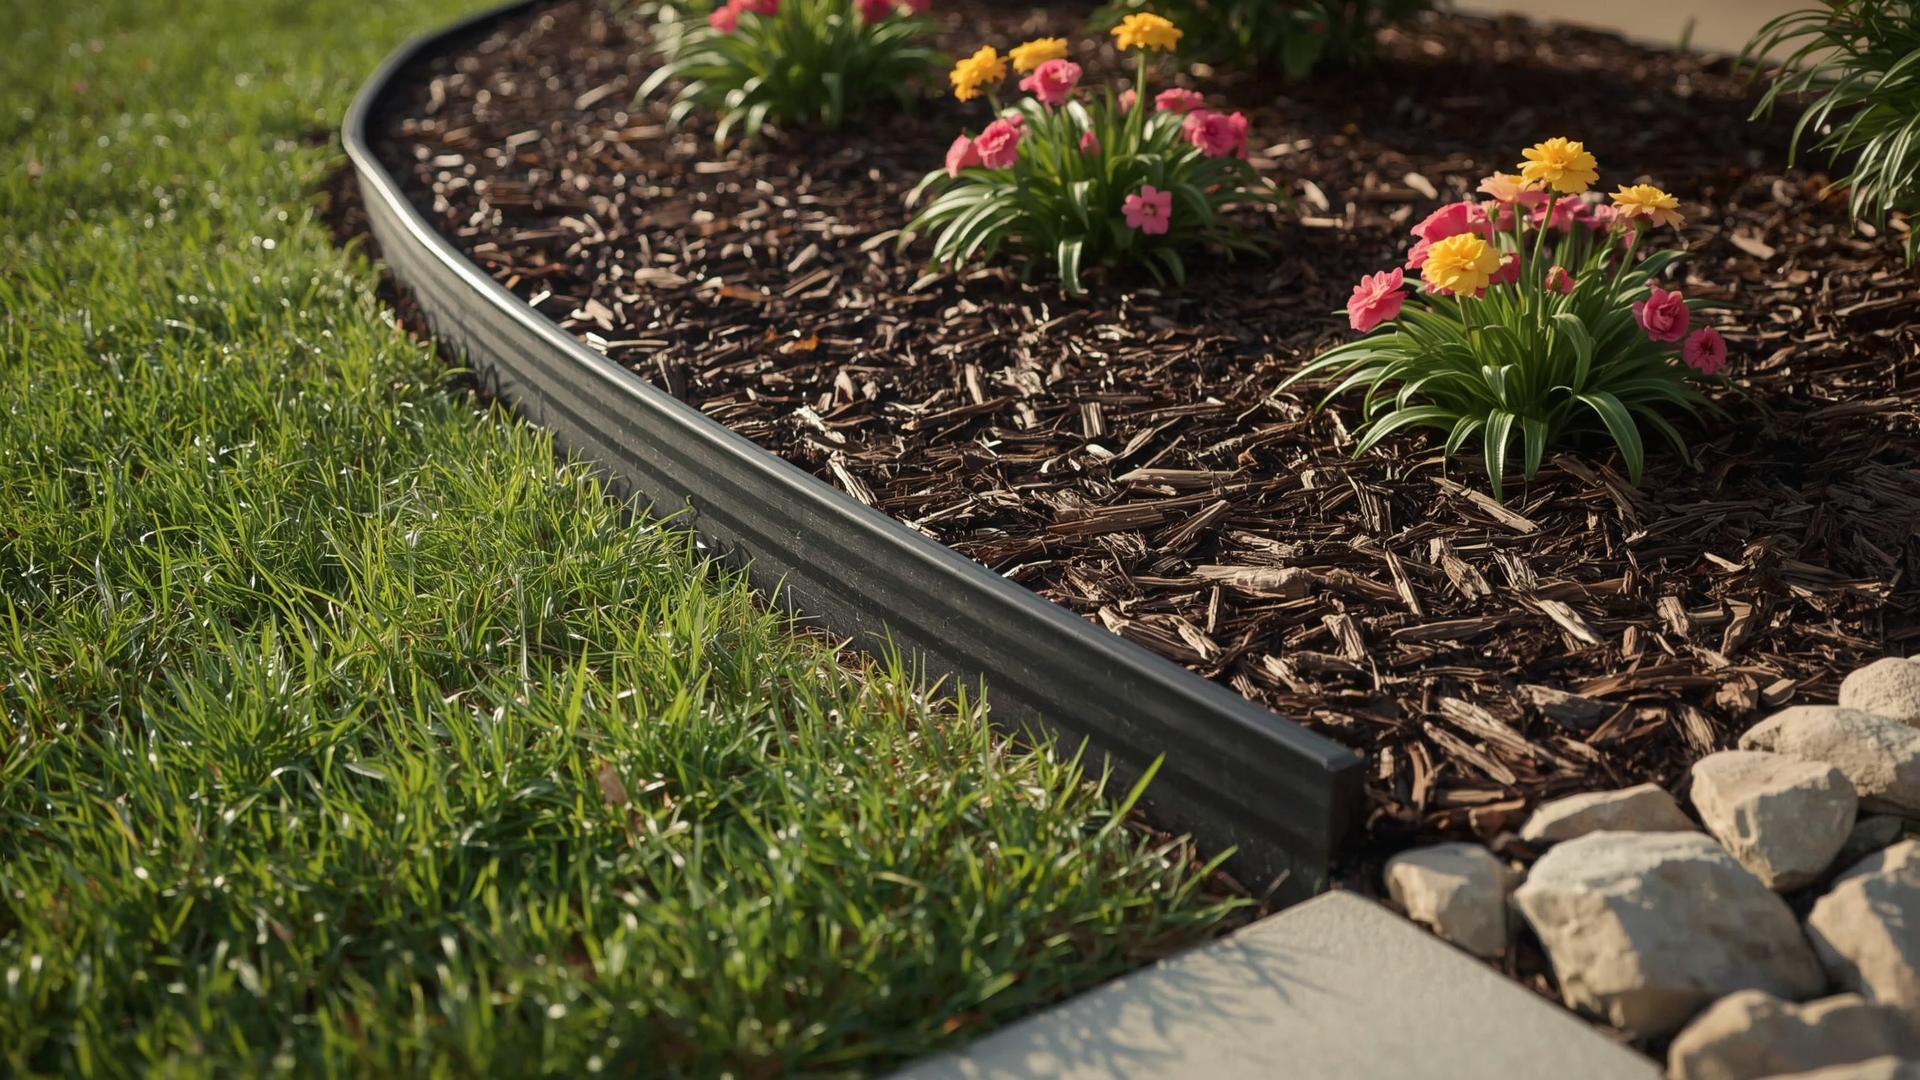
Quick Answer: Clean bed edges define the layout and separate it from lawn or paths. Steel edging holds curves well and lasts 15 to 20 years. Stone or brick edging suits formal designs. A 3 to 4 inch deep soil trench edge is a cost-free option that needs re-cutting every 6 to 8 weeks during growing season.
The edge of a garden bed is where the design either looks polished or falls apart. A clean, defined border makes even a young, sparse planting look intentional. A ragged edge makes even a mature, lush bed look neglected.
Edge Material Options
Steel edging is the most durable flexible option. It bends to follow any curve, sits flush with the lawn, and holds its shape for 15 to 20 years without cracking. Powder-coated versions resist rust. It costs between $1.50 and $3.00 per linear foot installed.
Brick and stone edging suit formal or cottage garden styles. They’re more expensive upfront but add a permanent, architectural quality. Natural stone costs $4 to $10 per linear foot depending on the material. Both options require a level base to prevent shifting.
A cut-trench edge — a clean vertical slice into the soil at the bed boundary — is free and effective. It creates a narrow channel that separates lawn grass from bed soil. You’ll need to recut it every 6 to 8 weeks during the growing season to stop grass from filling in.
Mow Strips and Practical Edge Design
A mow strip is a flat row of pavers or bricks set at grade level along the bed edge. One wheel of the lawn mower runs along it, eliminating the need for string trimming along the bed. It’s one of the most practical additions to any lawn-adjacent garden bed and reduces weekly maintenance time significantly.
| Edging Type | Cost per Linear Foot | Lifespan | Best For | Maintenance |
|---|---|---|---|---|
| Steel (powder-coated) | $1.50 to $3.00 | 15 to 20 years | Curved beds, modern design | Low |
| Aluminum | $1.00 to $2.50 | 10 to 15 years | Curved beds, lightweight install | Low |
| Brick / Clay Pavers | $3.00 to $6.00 | 20 to 30 years | Formal, cottage, heritage styles | Low (re-leveling) |
| Natural Stone | $4.00 to $10.00 | 30+ years | Rustic, naturalistic gardens | Low to moderate |
| Cut-Trench Edge | $0 (labor only) | 6 to 8 weeks | Budget gardens, informal beds | High (frequent recutting) |
| Plastic Roll Edging | $0.50 to $1.00 | 3 to 7 years | Temporary layouts, budget use | Moderate (heaving) |
How Do You Plan a Garden Bed Layout on Paper Before You Plant?
Quick Answer: Sketch your bed to scale — 1 inch on paper equals 1 foot in the garden. Mark existing structures and sun exposure zones first. Then place plants using circles sized to their mature spread. Use triangular offset spacing to fill the layout before buying any plants.
Planning on paper (or on a free digital tool) before you buy plants saves money and prevents layout mistakes that are frustrating to fix once plants are in the ground.
Drawing Your Bed to Scale
Start with a simple scale drawing. Use graph paper where 1 square equals 1 foot. Draw the bed outline, mark which direction is north, and shade the areas that get less than 6 hours of direct sun. This sunlight map determines which plants go where before aesthetics even factor in.
Mark any hard constraints: downspouts, fence posts, utility covers, and any areas with poor drainage. These limit your options and should be visible before you start placing plants.
Placing Plants on the Layout Plan
Draw each plant as a circle. Size the circle to the plant’s mature spread at the same scale as your drawing. A plant with a 24-inch mature spread gets a 2-inch diameter circle on a 1:12 scale drawing. Fit as many circles as possible without overlapping, using offset rows for the triangular spacing pattern.
Start with your tall background plants, then place mid-height perennials, then annuals. Leave deliberate open spots between young perennials for gap-filling annuals in the first one to two growing seasons.
Using Digital Planning Tools
Free tools like Canva, GrowVeg, and graph-paper apps can digitize this process. GrowVeg lets you place plant icons with built-in spacing data. Canva lets you build a precise layout with shapes and text labels. For simple beds, a pencil and grid paper work just as well and take 20 minutes.
What Are the Most Common Garden Bed Layout Mistakes and How Do You Avoid Them?
Quick Answer: The most common mistakes are planting without accounting for mature plant size, using only one height layer, ignoring access paths, and choosing a bed shape that fights the landscape rather than working with it. All four are fixable at the planning stage.
Most garden bed problems trace back to decisions made (or skipped) before the first plant went in the ground.
Ignoring Mature Plant Size
Nursery plants look small. A 1-gallon Rudbeckia costs $8 and fits in your palm. In three years it becomes a 24-inch wide, 36-inch tall clump. Plant it 8 inches from the next perennial and both plants will be fighting for space by year two. Always plan for mature size, not nursery size.
Creating a Flat, One-Height Layout
A bed where all plants reach the same height looks flat and uninteresting even when it’s healthy. It lacks depth, shadow, and movement. Use the three-layer approach even in smaller beds. A 4-foot wide border can still have a 30-inch grass at the back, a 20-inch salvia in the middle, and a 10-inch edging plant at the front.
Choosing a Shape That Fights the Space
A sharp rectangular bed in the middle of a curving lawn looks out of place. A sweeping kidney curve cutting across a formal geometric terrace creates visual tension. Match bed shape to the style and geometry of the surrounding space. Formal settings call for clean angles. Naturalistic settings suit flowing curves.
Skipping the Path Plan
A beautiful bed you can’t maintain doesn’t stay beautiful for long. Plan stepping access before planting. Flat stepping stones set flush with soil are invisible when plants grow around them but lifesaving when you need to deadhead, divide, or weed in the center of the bed.
Frequently Asked Questions
How wide should a garden bed be?
The ideal width is 4 feet for beds accessible from both sides. This lets you reach the center from either edge without stepping in. For a border against a wall or fence — accessible from one side only — keep the width to 24 inches maximum for comfortable reach.
Can you mix raised beds with in-ground planting?
Yes, and the combination works well in a layered layout. Raised beds work for vegetables and annuals with high soil amendment needs. In-ground borders suit established perennials and shrubs that prefer undisturbed root zones. The two types can share the same garden space when separated by path edging or mulch zones.
How do you choose between a formal and informal bed shape?
Match the bed shape to your home’s architecture. Formal geometric shapes — rectangles, squares, symmetrical designs — suit structured homes and hard-landscaped gardens. Informal curved beds suit suburban lawns, cottage-style homes, and any space where the goal is relaxed, natural beauty.
How long does it take a new mixed border to fill in?
Most mixed perennial and annual borders reach full coverage in two to three growing seasons. In the first year, plants establish roots and look sparse. In year two, perennials expand noticeably. By year three, a properly spaced planting fills the bed with little bare soil visible. Annuals speed this up by covering gaps while perennials mature.
What is the role of focal points in garden bed design?
A focal point is a plant, structure, or object that anchors the eye in the bed. It gives the design a visual center of gravity. Common focal points include a tall ornamental grass clump, a topiary shrub, a large decorative pot, or a short obelisk trellis. Every bed over 6 feet long benefits from at least one focal point placed at the visual midpoint or end.
Do you need to redesign a garden bed every year?
No. The perennial structure of a well-designed bed stays the same year after year. Annual redesign typically means swapping out the annuals that fill seasonal gaps, which takes an hour or two per bed. A mature perennial border often needs only deadheading, dividing overcrowded clumps every three to five years, and refreshing the mulch layer annually.